
Adenium Root Rot Rescue: Diagnose Before You Cut
Triage a soft Adenium, decide when cutting is justified, disinfect tools, manage toxic sap, rebuild drainage, and know which products to skip.
Rachel Torres · 2026-07-27 · Updated 2026-07-29 · 15 min read
Key Takeaways
- A soft Adenium is not automatically a rotten one, so diagnose before you cut. Drought, dormancy, cold injury, and a waterlogged root zone all mimic decay.
- Cut only when inspection shows localized dead or collapsing tissue you can remove. A pale cut face is a useful field observation, not proof that every pathogen is gone.
- Protect your skin and eyes from the toxic latex before you handle a cut plant. Adenium sap causes contact dermatitis, and all parts are poisonous if ingested.
- Do not dust the wound with sulfur or run a fixed heat or dry-cure schedule as a cure. No product on this page treats a wound the label does not cover.
- Call a plant diagnostic clinic for a valuable plant, fast-moving damage, or an uncertain cause. A clinic can separate infectious disease from root suffocation before you apply any pesticide.
A soft Adenium is not automatically a rotten Adenium. The urge to act fast is understandable, because a soft caudex feels like a problem one decisive cut will solve.
In practice, the first useful decision is whether you are looking at active decay at all. Drought, dormancy, cold injury, physical damage, root loss, and a waterlogged root zone can overlap in appearance.
Start with triage, not a rescue product. Separate the steps that reduce avoidable damage from products that merely look like a rescue kit, and do not assume every plant can be saved.
Is a soft Adenium always root rot?
No, softness is a symptom rather than a pathogen diagnosis, so compare the plant with its own recent history first. Check when it was watered, whether the pot stayed heavy, whether temperatures changed, where the softness begins, and whether the tissue is stable or spreading.
Compare symptoms with recent conditions
A plant that becomes slightly pliable during a dry rest may recover once its normal growing conditions return. Firmness that returns after a careful drink was never rot.
Escalate when the pattern is active or spreading
A plant with foul odor, sloughing roots, a wet or collapsing crown, spreading discoloration, or rapidly worsening wilt needs prompt inspection. The separate squishy-caudex diagnosis guide helps distinguish water-status changes from damage that justifies unpotting.
| What you observe | What it can mean | Next step |
|---|---|---|
| Pot remains heavy or water stands in a cachepot | Low oxygen and prolonged wetness are plausible contributors | Remove standing water, isolate the plant, and inspect drainage and roots |
| Localized bruise or soft patch after impact, cold, or sun damage | Noninfectious tissue injury may be involved | Document the boundary and watch for expansion rather than assuming one pathogen |
| Roots slough off, crown collapses, odor develops, or damage expands | Active root or crown decay is more likely | Unpot on a clean work surface and consider diagnostic sampling before cutting |
| Plant is valuable, symptoms are unusual, or previous rescues failed | The cause may not be identifiable at home | Call a plant diagnostic clinic and ask how it wants the sample handled |
What can actually cause root or crown rot?
Root rot is a syndrome rather than a single organism, so no visual recipe can name the cause. Saturated media can injure roots directly by starving them of oxygen, and damaged tissue is then colonized by water molds, fungi, or bacteria. Water molds (oomycetes such as Phytophthora and Pythium) are fungus-like microbes that swim through wet soil. Temperature preferences differ among these pathogens, so neither warm nor cool identifies the culprit.
Keep disease reports within their tested scope
Direct Adenium evidence is narrower than many care articles suggest. A 2023 report confirmed Neocosmospora ipomoeae as the cause of basal stem rot in a Brazilian nursery. A 2026 report identified N. keratoplastica as the cause of root and stem rot in sampled Adenium obesum. Other reports have involved different fungi. Those findings show why one visual recipe cannot diagnose every soft plant.
Improve wetness without claiming a diagnosis
Wet conditions still matter. UC IPM explains that prolonged wet soil both reduces root-zone oxygen and permits swimming Phytophthora spores to move through water-filled pores. Better irrigation and drainage reduce that risk, but they do not identify an organism already inside a plant.
When should you ask a plant clinic for a diagnosis?
Ask a clinic before treatment when the plant is rare or expensive, the lesion is moving fast, several plants are affected, the tissue does not fit a familiar injury, or a previous cut-and-repot attempt failed. A clinic can separate infectious disease from root suffocation or physical injury, and it can tell you whether a pesticide discussion is even relevant.
Prepare the sample the clinic can use
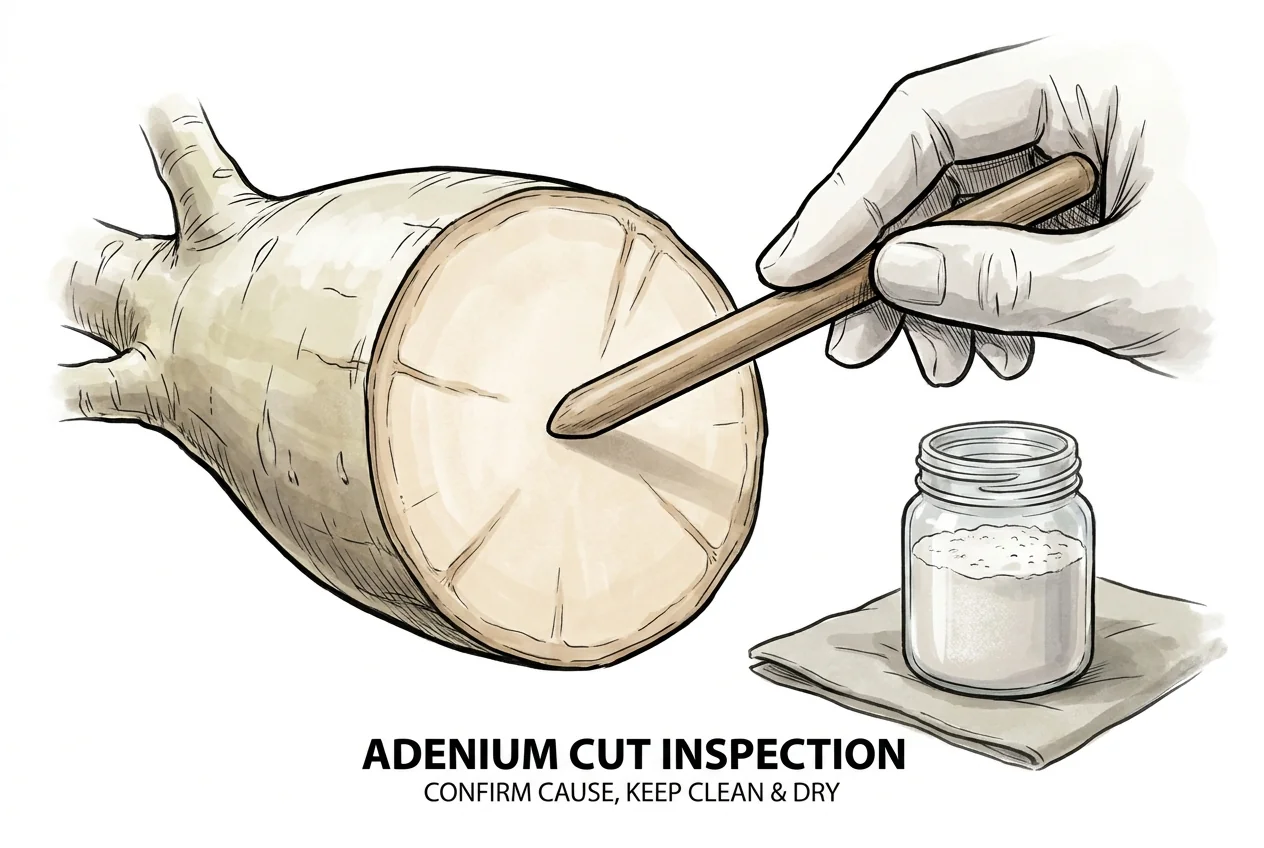
Call first. Clinics differ in what they accept and how they want it packed. In general, a specimen that includes the transition between affected and apparently healthy tissue is more useful than a completely cleaned, dried, sulfur-covered remnant. Keep photographs, the watering and temperature history, substrate details, and a list of anything already applied.
Do not send leaking plant sap or loose wet media without the clinic’s instructions. If other plants share tools, water, or a bench, isolate the suspect plant while you wait.
When is cutting justified?
Cutting is justified only when inspection shows localized dead, sloughing, or collapsing tissue you can remove without destroying the remaining structure. It is not justified merely because the caudex feels different after watering or because one cut face is not perfectly white.
Protect yourself from latex and tool injury
Work on a stable, washable surface with children and pets out of the room. Adenium contains milky latex that can cause contact dermatitis, and all parts are poisonous if ingested.
Wear task-appropriate gloves and eye protection, avoid touching your face, and wash exposed skin. The protective-gear guide covers fit and skip criteria for ordinary repotting equipment.
Make the fewest controlled cuts
Remove the plant from the pot, set aside any sample the clinic requested, and distinguish intact firm tissue from roots or crown material that is visibly dead and breaking down. Make the fewest controlled cuts needed to remove localized decay. Firm, pale tissue is reassuring, but color alone cannot prove that internal infection is absent. Repeatedly shaving the plant to chase an ideal color creates a larger wound and more latex exposure.
Stop when no stable tissue remains, the crown is structurally lost, the damage keeps extending beyond what you can remove safely, or the plant cannot be supported after the cut. At that point, replacement may be the safer choice.
Which cutting tool fits the job?
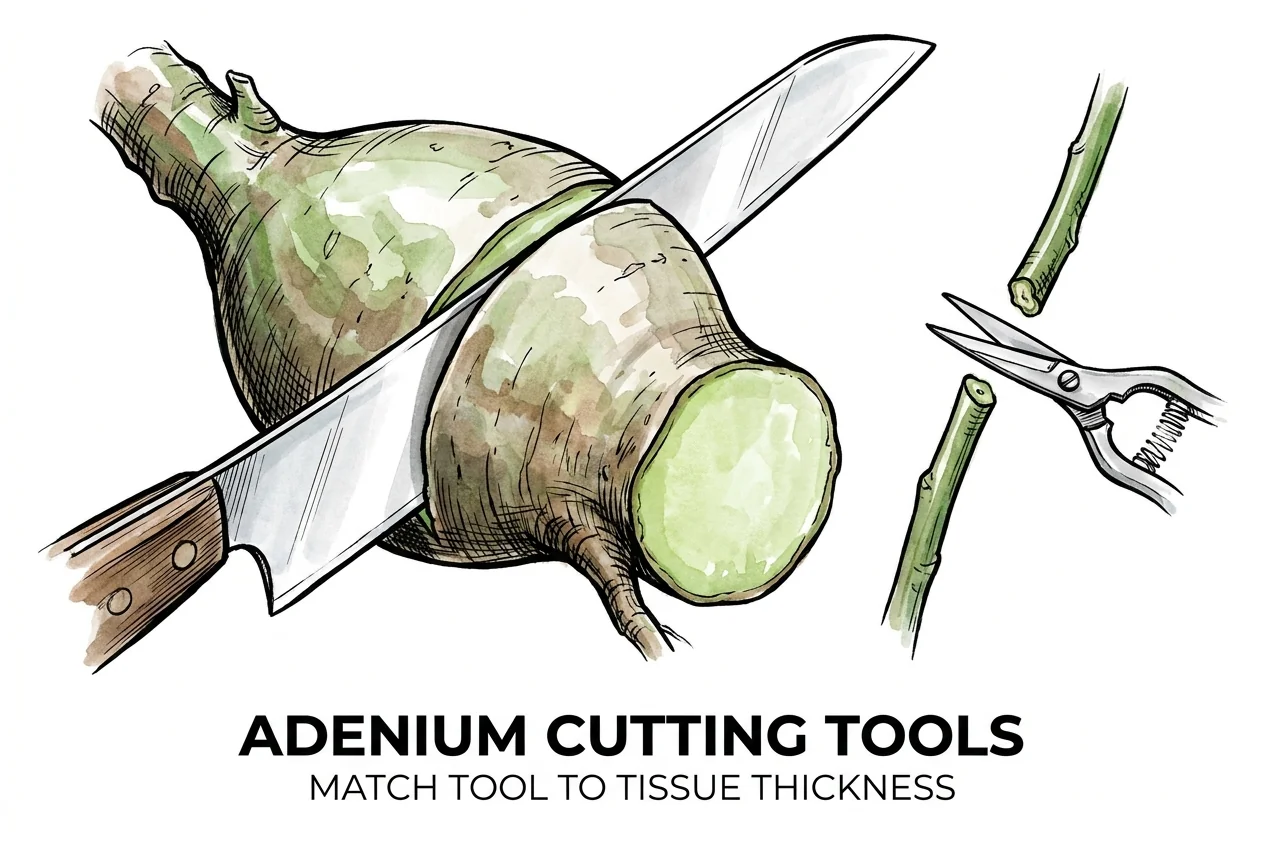
Match the tool to the actual tissue thickness and make one controlled cut without crushing. Fine snips handle fine roots, while a thick woody root or caudex needs a tool built for that diameter.
Use fine snips only for fine tissue
For fine roots and thin, soft tissue, the linked gonicc Micro-Tip snips are a plausible convenience tool. Buy them only if the tissue fits between the blades without force and you do not already own sharp, clean snips. Skip them for a thick woody root or caudex section.
Skip a folding scalpel for thick-caudex work
The linked outROAR folding scalpel is a slip-joint craft or EDC knife compatible with replaceable blades. It is not a sterile surgical instrument or a purpose-built thick-caudex cutter. The nonlocking handle, exposed blade, and leverage needed for a large cut make it a poor recommendation here.
Stop when the cut path is unstable
For material beyond fine roots, choose a tool designed for the diameter and resistance of the tissue, with a secure grip and a controllable cutting path. If you cannot make the cut without twisting, sawing toward your support hand, or applying unstable force, stop and get experienced help.
How should you clean and disinfect the tool?
Clean sap and plant debris off the blade first, then disinfect, because organic material shields microbes from a disinfectant. Wet the cutting surface with a product and contact time appropriate to the tool, keep the area ventilated, and let the tool dry before the next cut.
Disinfecting lowers contamination. It does not make a household tool sterile.
Use a product you can store safely
Undiluted 70% isopropyl alcohol is a practical pruning-tool option in LSU AgCenter guidance. The linked McKesson 70% isopropyl alcohol is one brand, not a special plant product. Buy it only if you do not already have a suitable 70% product and can store and use a flammable liquid safely. A 91% product is not automatically useless. The exact process and compatible contact guidance matter more than repeating one concentration as magic.
Keep alcohol away from ignition sources
Keep alcohol away from flame, heat, sparks, and a running heat mat. Do not spray toward your face or mix it with other cleaners. Follow the current container label and safety data sheet.
Should sulfur or a fungicide go on the wound?
Keep sulfur off the fresh Adenium cut, because a caudex wound and generic root-rot rescue are not labeled uses. Neither sulfur nor cinnamon establishes the diagnosis or seals the plant against the pathogen you have not yet identified.
Do not extend a sulfur label to a fresh wound
Do not put the linked Bonide Sulfur Plant Fungicide on an Adenium cut. EPA records identify it as a registered 90% sulfur product (EPA reg 4-62) for listed sites and pests, but a fresh caudex wound is not among them. Sulfur also does not diagnose whether the problem is fungal, a water mold, bacterial, or noninfectious.
Use a systemic only after a covered diagnosis
Do not assume a systemic fungicide is a cure. It can fail because the organism is wrong, the plant or site is not on the label, the disease is too advanced, the product cannot reach the infection, or the damage is not infectious. If a clinic identifies a target, use only a product whose current label covers the plant, site, pathogen or disease, application method, and jurisdiction.
Let the wound condition guide rewatering
After cutting, keep the wound clean and protected from splash. Let the surface become dry and firm before placing it against media. The time depends on wound size, humidity, airflow, temperature, and how much viable root remains. There is no evidence-based universal four- or seven-day Adenium schedule.
Does a heat mat help a recovering Adenium?
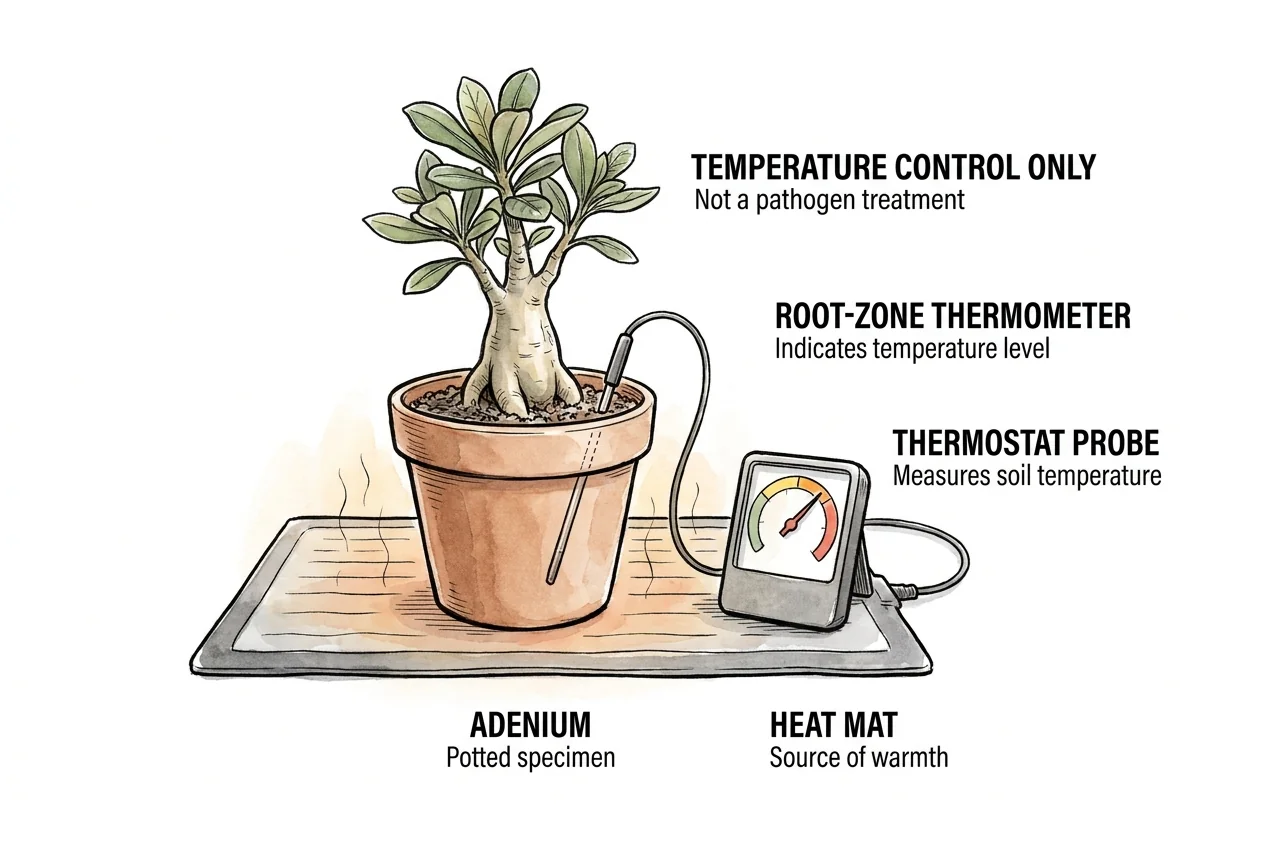
Bottom heat is temperature-control hardware, not pathogen control, so measure the root zone before deciding whether any heat is needed. A mat cannot sterilize the pot, and a fixed 27-30°C target is not a root-rot treatment.
Use heat only for a measured temperature deficit
A thermostatic mat can help when a recovering plant is actively growing or rooting and the measured root zone is colder than you intend. Some water molds are actually favored by warm conditions, while excessive bottom heat can dry a small, root-poor plant unevenly.
Check the hardware against the work area
The linked VIVOSUN heat mat and thermostat combo is reasonable propagation hardware if you have measured a genuine temperature deficit. Buy it only if the current package includes the controller you expect, the mat fits the dry protected work area, and you can place the probe where it represents the root zone. Skip it in an already warm room or if the goal is to kill a pathogen.
Verify the root-zone reading independently
Use the current manufacturer instructions, keep electrical connections dry, and verify temperature with an independent reading during setup. Do not run it near evaporating alcohol or treat the thermostat display as proof that the whole pot is at one temperature.
What should you repot into, and when should you water?
Match the finished mix to the roots that remain, not to an ingredient name on the bag. Use a clean container with unobstructed drainage and a substrate whose finished behavior fits the remaining root system, pot height, air movement, and your watering habits.
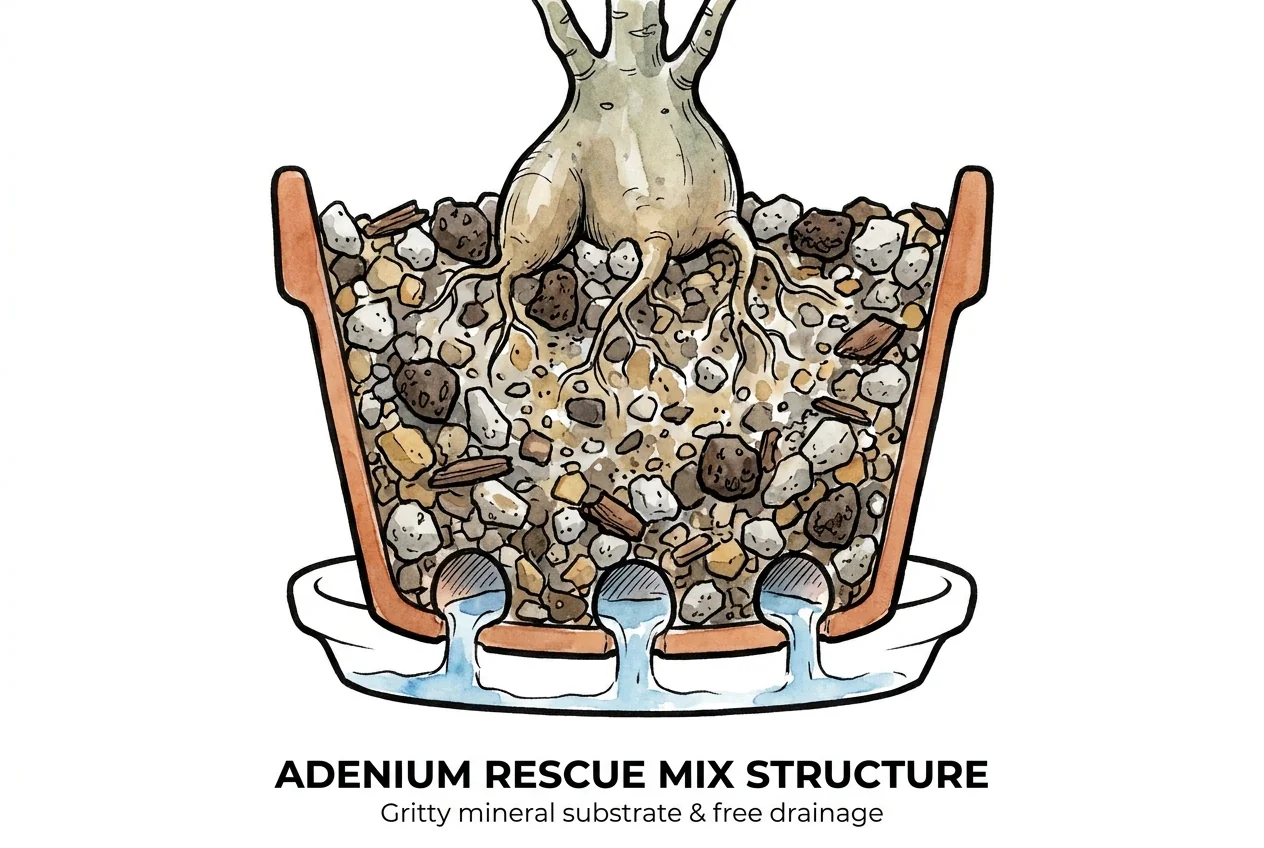
Match the finished mix to the remaining roots
The caudex substrate comparison explains why ingredient names alone do not predict air and water in the final mix.
Buy pumice only for a defined mix role
The linked Bonsai Jack horticultural pumice is a screened aggregate, not a disease treatment or a complete recipe. Buy it only if the exact listing is available and you need that particle range as one component. Skip it if your existing clean mix already drains and re-wets appropriately, or if a root-poor plant would dry too abruptly in the proposed container.
Keep open wounds out of wet media
Do not bury an open crown wound against wet media. Support a top-heavy plant without packing the mix tightly around the injury. Rewatering depends on the roots that remain and how dry the plant and mix actually are. A rootless cutting, a plant retaining many functional roots, and a dormant plant should not receive the same fixed waiting period or volume.
Use more than new leaves to judge recovery
Record pot mass or another repeatable moisture cue once the plant is stable. Watch for renewed firmness and root attachment without allowing the pot to remain saturated. New leaves alone do not prove that a root system is healthy. Stored reserves can support short-lived top growth.
Before the retained tissue goes into fresh medium, I photograph every firm root remnant against a clean background and align the plant with a pot-rim orientation mark. On a duplicate image, I label existing root tips, cut ends, and the points that will carry the plant’s weight. This prevents an old buried root from being reported later as new recovery growth.
I keep the same map with the first stable pot-mass record and the initial support position. If the plant needs a stake or brace, I record that separately from root attachment. A cutting that feels secure because of support has not yet shown that it can anchor or drink on its own.
What is a practical step-by-step rescue plan?
Work the sequence in order, stopping to reassess after each step rather than reaching for the next product. Each step reduces avoidable damage before the one after it.
- Isolate and document. Move the plant away from shared irrigation and photograph the whole plant, crown, pot, and symptom boundary.
- Stop prolonged saturation. Empty standing water and prevent more irrigation while you prepare a clean inspection area. Do not assume dehydration treatment is needed.
- Protect yourself. Keep people and pets out, wear suitable gloves and eye protection, and plan for toxic latex and a sharp tool.
- Call before sampling when the case warrants it. A clinic may want the plant, a transition sample, roots, media, or photographs in a specific condition.
- Unpot and inspect. Preserve any requested sample, then separate intact firm tissue from roots or crown material that is visibly dead and breaking down.
- Cut only when justified. Remove localized collapsed tissue with the fewest controlled cuts. Clean and disinfect the tool between affected areas. Do not chase color indefinitely.
- Keep the wound clean. Do not apply the linked sulfur. Allow the surface to become dry and firm under clean, ventilated conditions. Use condition, not a fixed day count.
- Rebuild the root-zone conditions. Use a clean draining container and a mix selected for the roots that remain. Keep the crown or open wound out of wet media.
- Water from evidence. Adjust to root retention, plant water status, temperature, pot mass, and mix behavior. Avoid both standing wetness and an automatic long drought.
- Escalate or stop. Seek diagnostic help if decay resumes, several plants become affected, or treatment decisions require a pesticide. Discard the plant under local disease-waste guidance if no safe, stable tissue remains.
| Linked product | Who it can fit | Who should skip it |
|---|---|---|
| gonicc Micro-Tip snips | A grower cutting fine roots or thin soft tissue who lacks suitable sharp snips | Anyone facing a thick root or caudex section, or who already owns a better-fitting tool |
| outROAR folding scalpel | No recommended role in a thick-caudex rescue. The product name identifies the exact item reviewed | Anyone seeking a sterile, locking, or purpose-built caudex cutting tool |
| McKesson 70% alcohol | A grower who needs a basic 70% isopropyl product and can handle flammable liquid safely | Anyone who already owns a suitable disinfectant or cannot provide safe ventilation and storage |
| Bonide sulfur | No recommended role on the fresh Adenium wound discussed here | Anyone buying it as a root-rot cure or wound dressing |
| VIVOSUN mat/controller | A grower correcting a measured propagation-zone temperature deficit with controlled hardware | Anyone in an already warm space or expecting heat to kill a pathogen |
| Bonsai Jack pumice | A grower who needs a screened aggregate component and has designed the finished mix | Anyone expecting one bag to diagnose disease, guarantee drainage, or fit every recovering root system |
Keep the rescue kit proportional to the diagnosis
Use an appropriate cutting tool only when cutting is necessary, use a basic disinfectant you can handle safely, and buy a substrate component or thermostatic mat only when a measured setup gap calls for it. Skip the folding scalpel for thick caudex work and skip sulfur for the wound.
Stop adding products when the cause remains uncertain
If the plant continues to soften, develops odor, loses structural support, or repeats the same failure after repotting, stop adding products. Preserve the history and seek a diagnosis. That decision is more likely to protect the rest of the collection than another blind treatment.
Affiliate Disclosure
This article contains Amazon affiliate links. As an Amazon Associate I earn from qualifying purchases. If you use these links, the site may earn a commission at no extra cost to you. Product availability, price, and specifications can change. Check the current listing before buying.