
Pachypodium Gracilius Rooting Guide for Bare-Root Imports
Root a bare-root Pachypodium gracilius import with careful rot removal, rooting hormone, bottom heat, an airy mix, and reliable signs of rooting.
Rachel Torres · 2026-02-12 · Updated 2026-08-05 · 9 min read
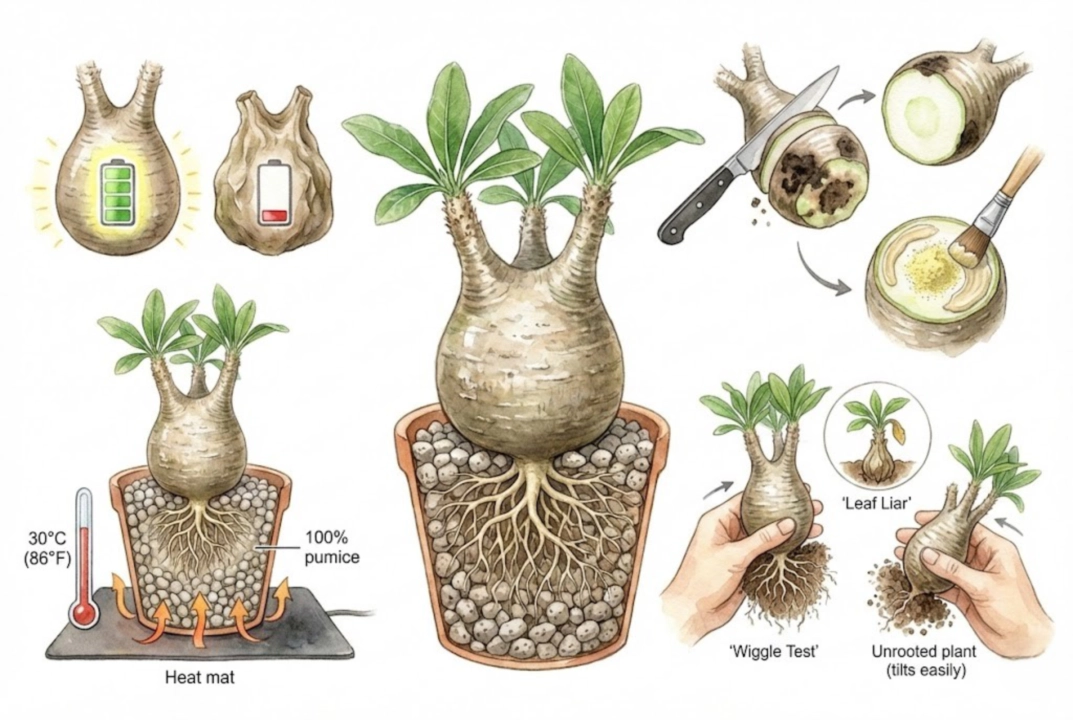
Key Takeaways
- An unrooted import lives on the stored reserves in its caudex, so root it while it is still firm. Firmness reflects water and tissue condition, not a literal fuel gauge.
- Pare back only confirmed rot with a sterilised blade until the cut is clean and firm, and stop if rot is extensive. Wear gloves and eye protection for the spines and irritant sap.
- Rooting hormone helps when the product fits the tissue and its label is followed. Avoid an improvised hormone-and-sulfur paste, which changes the dose and mixes products off-label.
- Use a thermostat-controlled mat and a very airy mix to add measured warmth and air without overheating the base. A warm root zone can speed callus and rooting, but the useful range depends on the setup.
- Confirm rooting from several signs together (gentle resistance, persistent new growth, steady turgor, and roots at the drainage holes). New leaves can grow on stored energy before any roots form.
Stabilising a bare-root Pachypodium gracilius import means managing two competing risks. Desiccation and tissue breakdown must be balanced before potting.
This plant is now usually treated as Pachypodium rosulatum subsp. gracilius, so use the accepted name when checking current botanical or trade guidance.
Pachypodium is CITES-listed, so buy artificially propagated, seed-grown plants with proper CITES and plant-health paperwork.
Please don’t treat rescuing wild-collected plants as a reason to buy them (demand for wild-collected material drives more collection of an already-pressured genus).
A bare-root import needs a different decision sequence from an established potted plant. Inspect the tissue, protect the wound, then choose a rooting environment that can be monitored.
Do not apply routine watering or feeding advice before that sequence is complete.
Why are imports so hard to root?
The caudex is a finite biological battery that loses charge every day the plant sits unrooted.
Unlike a potted plant drawing energy from soil, an import has to cannibalize its own starch reserves to build new roots.
What is the Battery Concept?
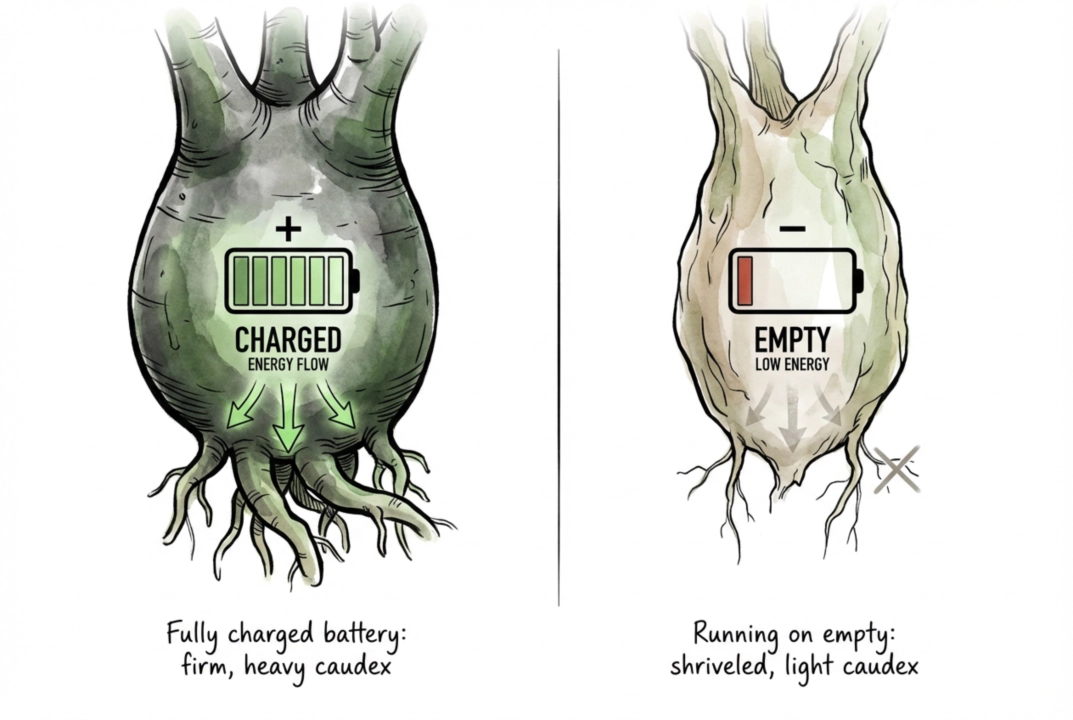
It’s a rough metaphor. The plant has a limited pool of stored reserves and water to draw on while it builds roots, so a firm, heavy caudex is generally in better condition than a shriveled, light one.
Weight and firmness mainly track water content and tissue health rather than directly measuring starch. Even a plump caudex can hide early rot, so use the battery idea as a general read, not a precise gauge.
How do I distinguish rot from dehydration?
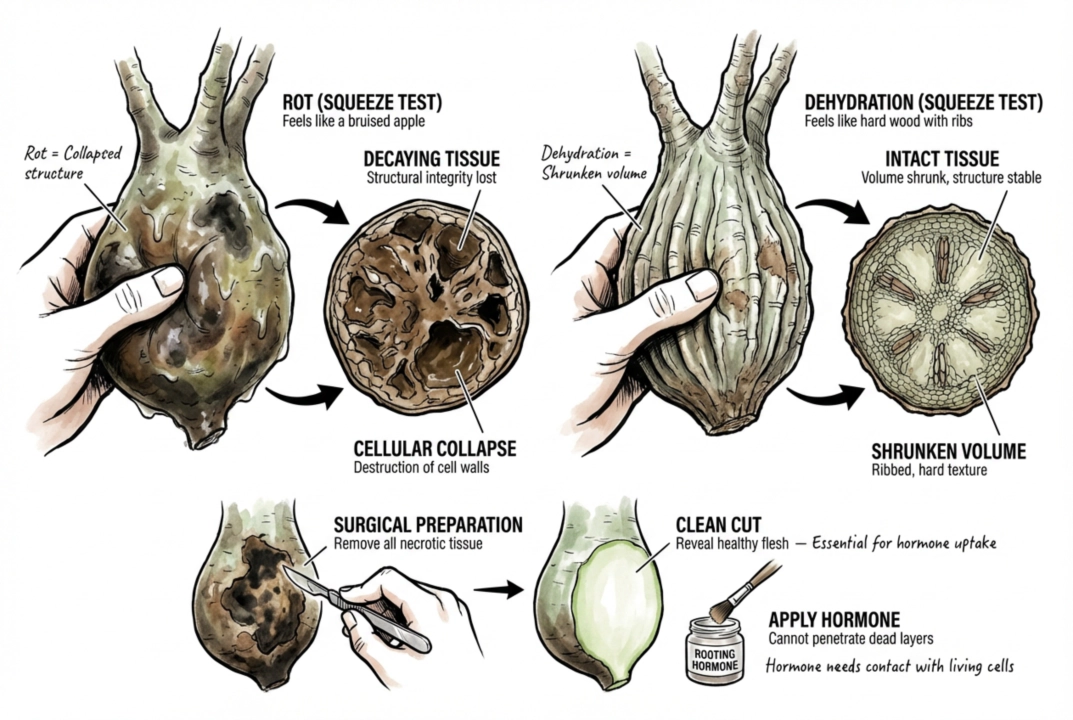
Distinguish dehydration from rot
Assess gently rather than squeezing hard, which can bruise healthy tissue. In general, rotten tissue is soft and dark and may collapse or weep, while merely dehydrated tissue is firm and shrunken with vertical ribs but still solid.
This is a useful first read, not a definitive diagnosis. Dark, soft areas can come from fungi, water molds, bacteria, or physical damage, and a surface spot is not automatically fungal hyphae. If a plant is valuable and the cause is unclear, cut into the transition zone cautiously and seek a proper diagnosis when needed.
Use warmth as a measured aid
Warm conditions at the base can speed callus formation and root initiation compared with a cool room, which is why the bottom heat covered below is worth setting up.
What is the correct preparation protocol?
Remove Only Confirmed Dead Tissue
Remove rotten and dead tissue until you reach clean, firm, pale white or light-green flesh, so you are potting sound tissue rather than an active infection.
Make every cut deliberate
Use a sterilised, sharp blade and re-sterilise it between cuts. Wear gloves and eye protection because of the spines and irritant sap, discard removed tissue, and keep the plant isolated until it is established.
If the rot is extensive, stop and reconsider rather than whittling the whole caudex away. A badly rotted import may not be salvageable.
How do I perform the surgery?
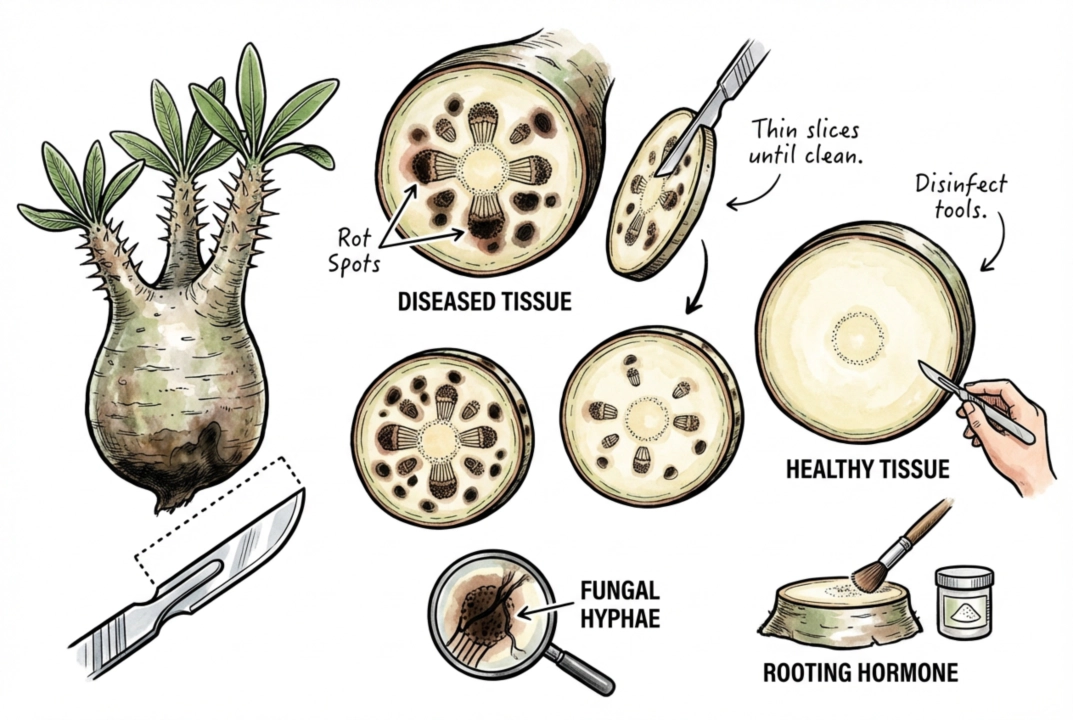
Take the base back in thin slices until you reach clean, uniformly pale tissue. Dark streaks or spots in the cross-section can indicate rot tracking up through the tissue, so remove clearly diseased material.
Not every dark vascular mark is spreading infection because some discoloration is old or superficial. Remove what is soft and clearly rotten without needlessly slicing away large amounts of firm, healthy caudex.
Should I let it dry after cutting?
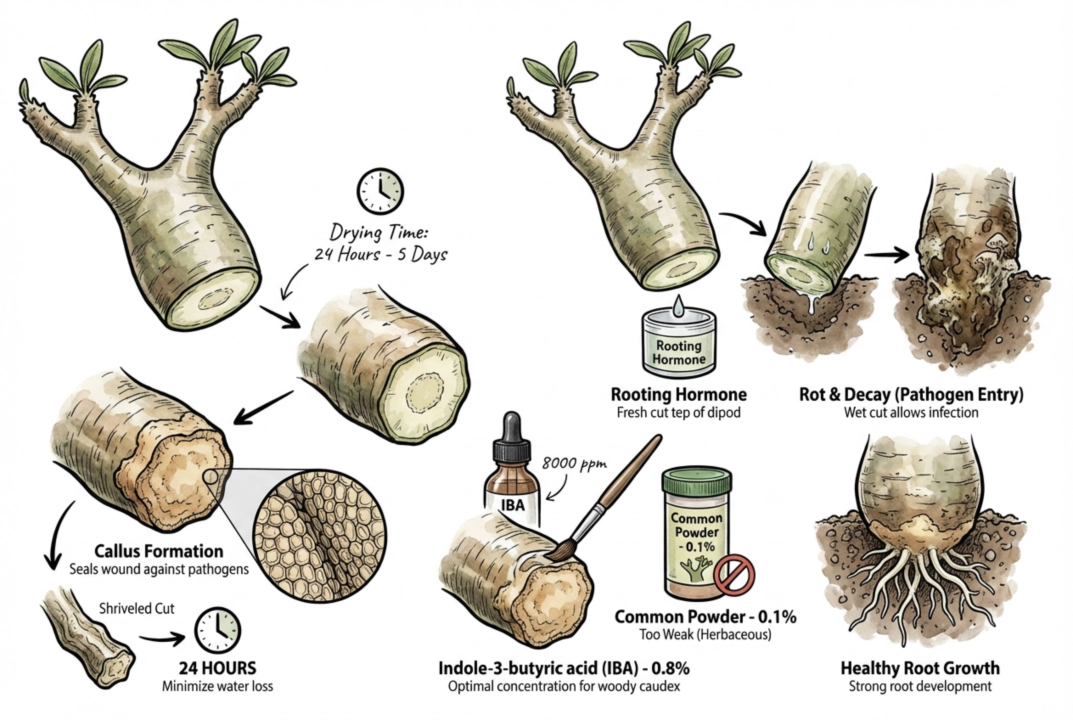
| Condition | Practical check | Goal |
|---|---|---|
| Fresh or large cut on a firm plant | Keep the wound clean and ventilated until the surface is dry and firm | Protect the cut without imposing a calendar deadline |
| Small cut on a dehydrated plant | Recheck the surface frequently so drying does not become prolonged tissue loss | Limit additional water loss while the wound seals |
Yes. Drying (callusing) helps seal a clean wound, but the time depends on cut area, tissue hydration, temperature, and humidity.
Keep the surface clean and ventilated until it is dry and firm rather than following a fixed hour count. A large or cool, humid wound may take considerably longer.
Don’t pot until the surface is dry to the touch, and reassess a plant that is losing reserves while it waits.
Which rooting hormone actually works?
Indole-3-butyric acid (IBA) is the auxin most commonly used in rooting products, and a higher-strength IBA powder is a reasonable choice for a woody caudex base. It is not a proven requirement, though, because no published trial pins an ideal IBA strength for this species. Treat any exact percentage as a starting point.
Match Hormone Strength to Tissue
Match the product strength to the material and follow the label.
Manufacturers generally place lower-strength powders (around 0.1% IBA) with soft, herbaceous, and succulent cuttings, and higher strengths (such as 0.8%) with semi-hardwood and woody material, so a stronger powder can suit a woody base, but stronger is always better is not true. Too much auxin can inhibit rooting.
Why is IBA better than NAA?
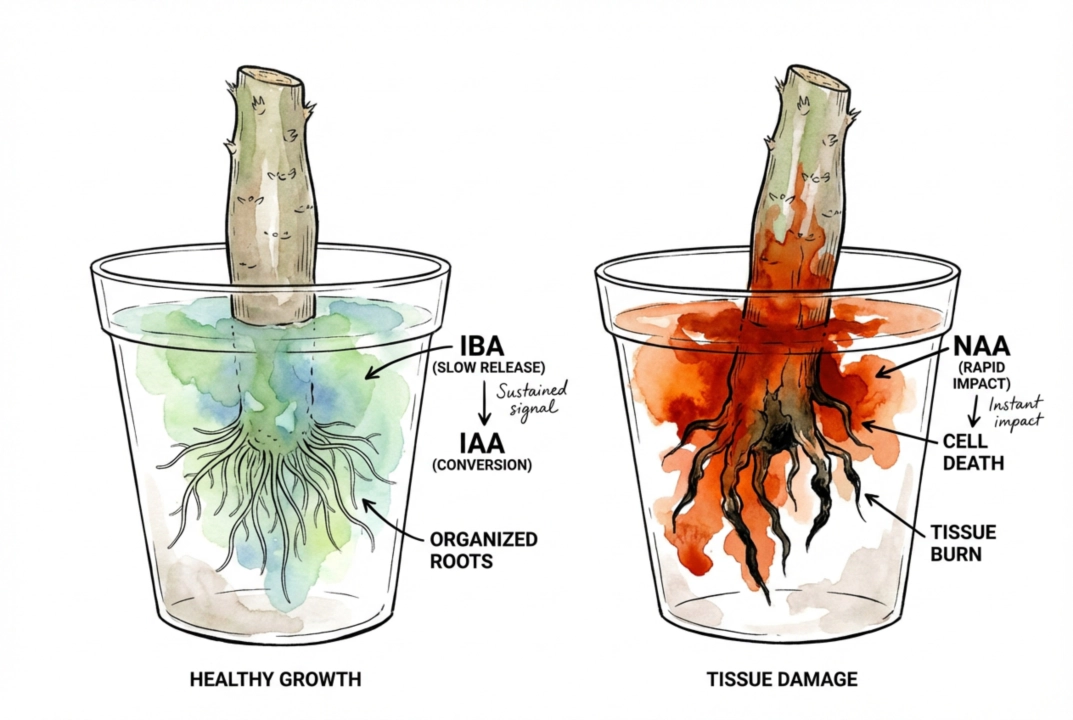
IBA is popular partly because it is relatively stable and forgiving, with plants converting it toward active auxin (IAA) gradually. That is why it is the default in many rooting powders.
NAA is also an effective rooting auxin when used at appropriate concentrations. It is not inherently harsh, and the best auxin, strength, and timing depend on the species and tissue. IBA is a sensible, widely available choice here, not proof that NAA is dangerous.
What is the Paste Method?
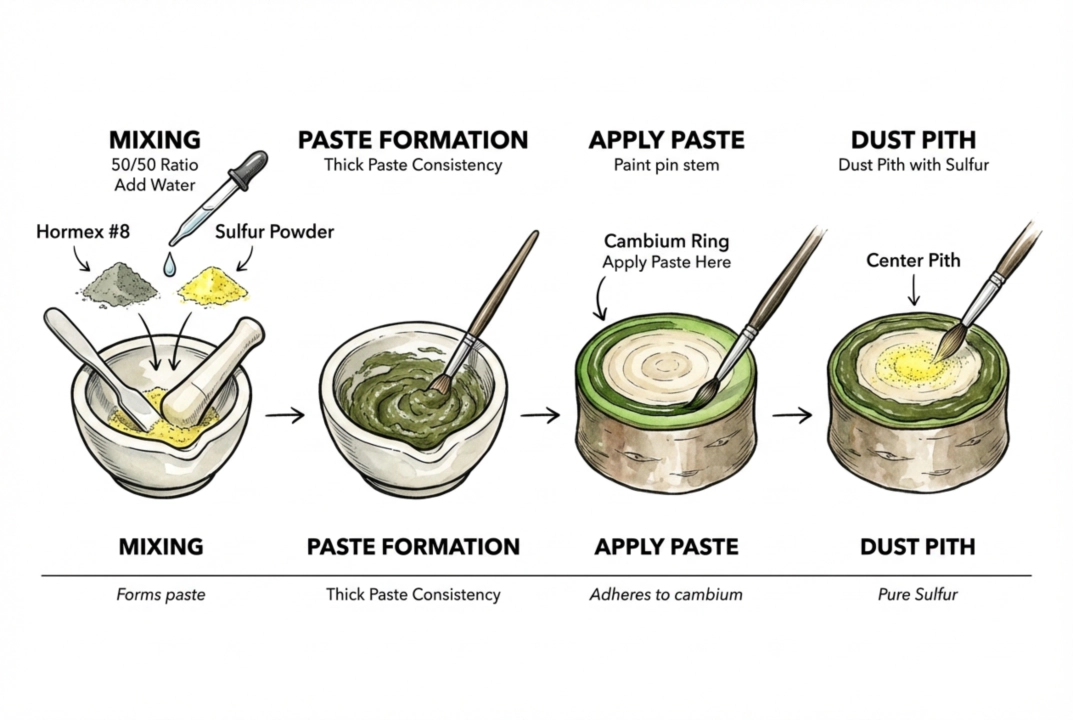
The simplest lower-risk approach is to follow the rooting powder’s own label, choosing a higher-strength IBA powder only when its label covers woody cuttings. In practice that usually means lightly dusting the prepared base and tapping off the excess before potting, not building a custom paste.
Keep hormone and fungicide separate
Be cautious with the popular hormone plus sulfur and water paste recipe. Mixing the powder roughly 50/50 with sulfur roughly halves the actual IBA concentration you apply, and combining two products this way is off-label for both.
Sulfur has its own label directions, crop and temperature limits, and irritant dust. Warm conditions can also raise phytotoxicity risk, which conflicts with the bottom-heat step below. If you want a fungicidal dust, use a labeled product as directed and keep it separate from the hormone. If you apply hormone, place it on the outer living ring where roots form, wear gloves and eye protection, and keep dust out of your face.
What environment triggers rooting?
Control Root-Zone Warmth
Keep the root zone warm. Some propagation guidance uses roughly 73–80°F (about 23–27°C) as a starting range, but whether a particular Pachypodium benefits from the warm end depends on tissue, airflow, and moisture. A fixed 86°F is not a proven requirement.
Cool room temperature slows callus and rooting rather than stopping them outright (it’s not that the plant’s enzymes don’t function below 30°C). Steady warmth simply speeds the process. Excessive heat, meanwhile, also speeds pathogen growth, respiration, and water loss.
Can I use a regular heat mat?
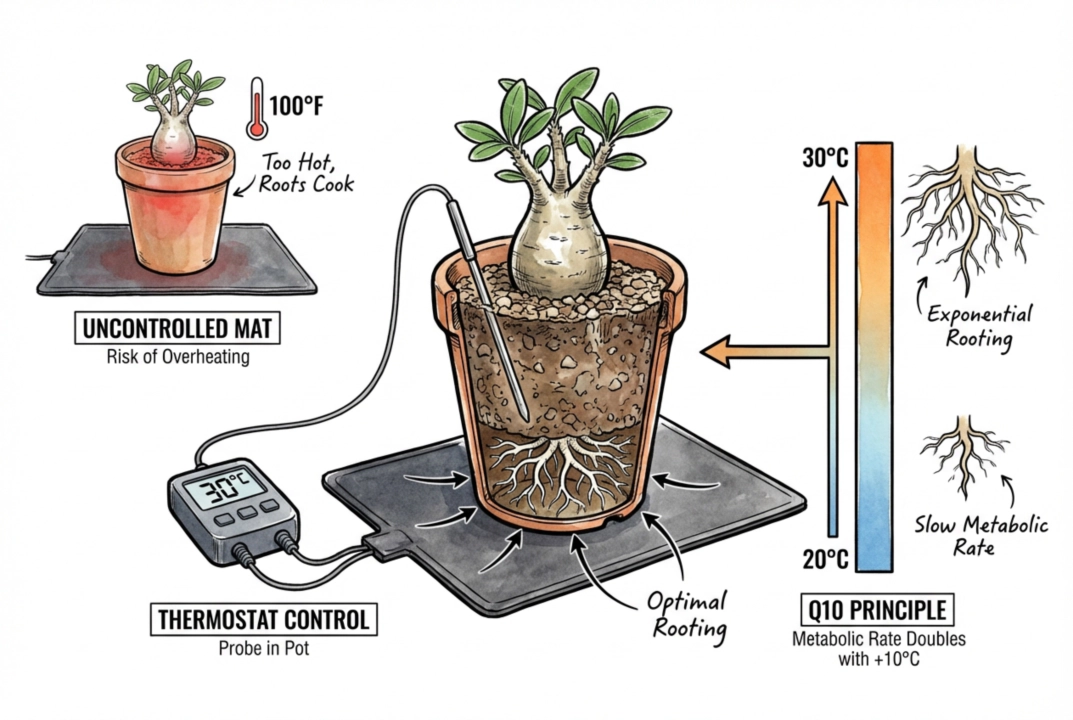
Yes, but control it with a thermostat and place the probe in the medium (not on the bare mat or pot bottom).
Warmer medium can speed metabolism within limits, but it is not a guarantee that rooting doubles at a particular temperature.
A mat left uncontrolled can overheat the roots. Use steady, measured warmth and compare the actual root-zone reading with the plant’s condition. The heat-mat chooser explains the measurement and skip criteria.
Why use an airy, gritty mix?
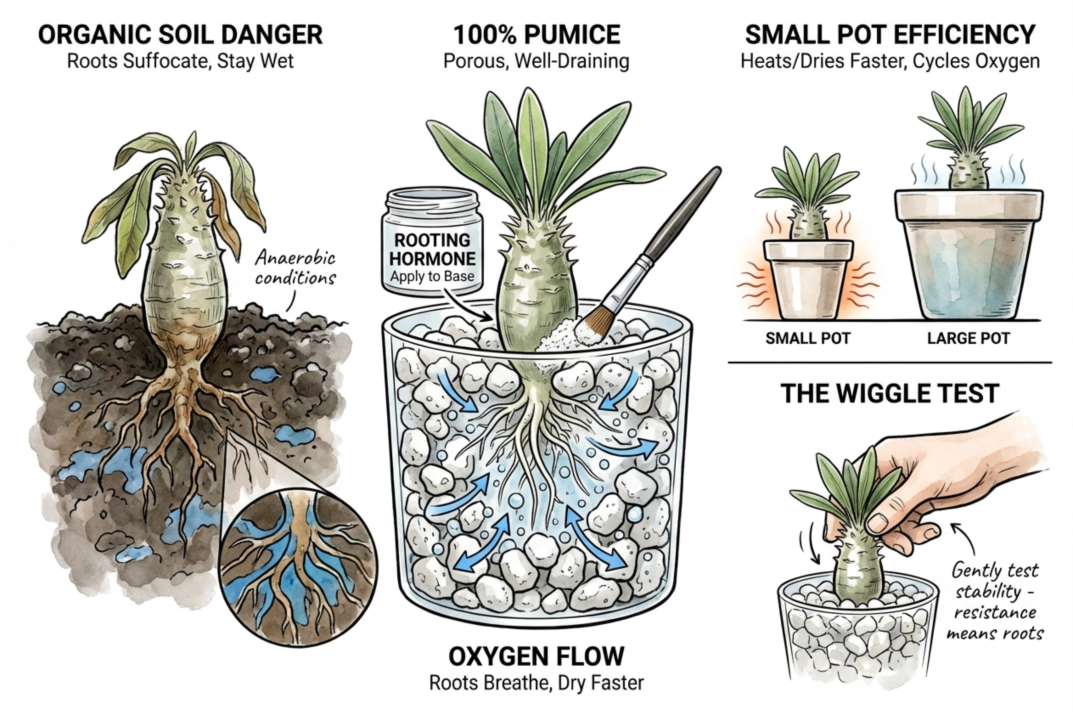
Build an airy rooting medium
A very free-draining, well-aerated medium lets you keep the base lightly moist without waterlogging it, and new roots need oxygen as much as water. Horticultural pumice is one possible component, but it is not the only one. Coarse sand, bark, or a gritty mineral blend can all work. Pure pumice isn’t magic or mandatory. With fine particles or heavy watering even pumice holds water. Use the substrate comparison to judge the finished mix rather than an ingredient label, and keep the rooting medium from staying saturated.
A modest pot can help it dry and warm more predictably. Size it to the plant and root mass rather than a fixed inch measurement.
Avoid wedging a heavy caudex tightly into the medium just to hold it upright, because that can make the later does it resist check misleading.
How do I know if it is working?
A gentle resistance check is one clue to rooting without unpotting the plant, but it is only a hint, best combined with other signs.
Why can’t I trust the leaves?
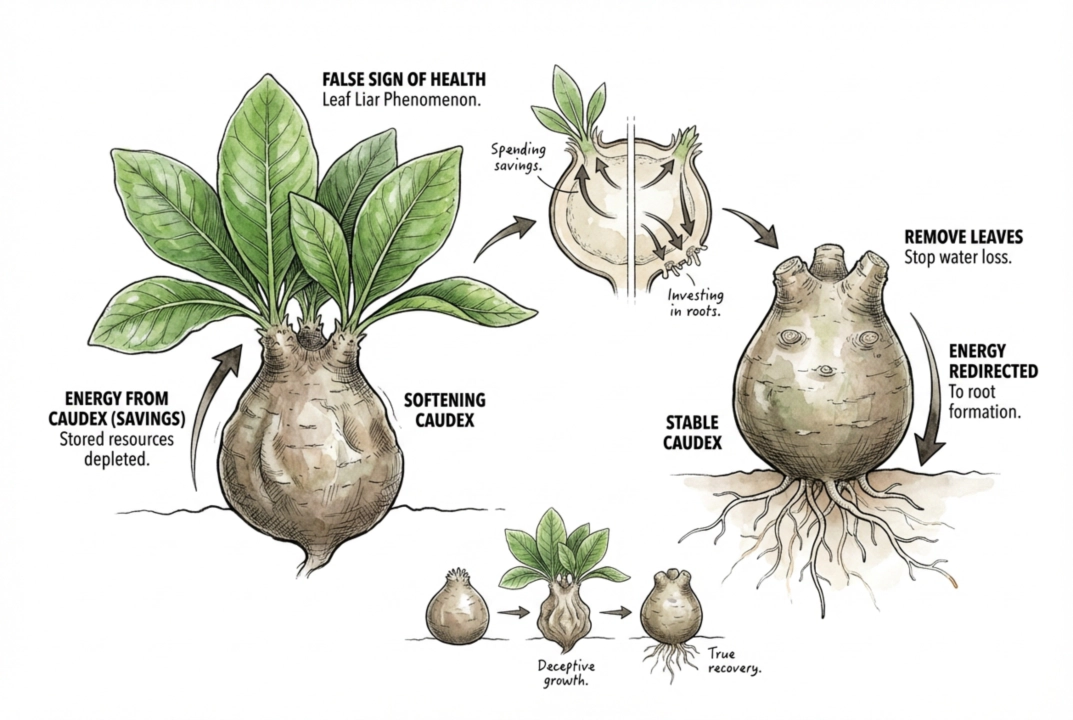
Leaves can flush on stored energy before any roots form, so leafing out alone doesn’t confirm rooting.
The telling combination is leaves growing while the caudex softens. That suggests the plant is drawing down reserves without new roots to replace them.
Removing some leaves to cut water loss can help in that situation, but leaves also supply the sugars and hormones that support rooting, so thin them rather than stripping the plant bare, and manage humidity and light instead of relying on defoliation alone.
To tell new growth from reserve drawdown, I photograph the caudex from the same marked orientation before the first new leaves appear. I mark existing wrinkles, scars, and soft-looking zones on a duplicate image, then compare only matching views later. This tells me whether the body is broadly holding its reserves or whether a new flush is being funded by continued collapse.
I pair that image with pot mass and the condition of the base. A shoot that grows while the caudex declines is a reason for me to reassess the whole setup, not proof that more water will help. The card keeps a dramatic leaf flush from outweighing the quieter evidence that the plant may not yet be replacing what it uses.
How do I check for rooting?
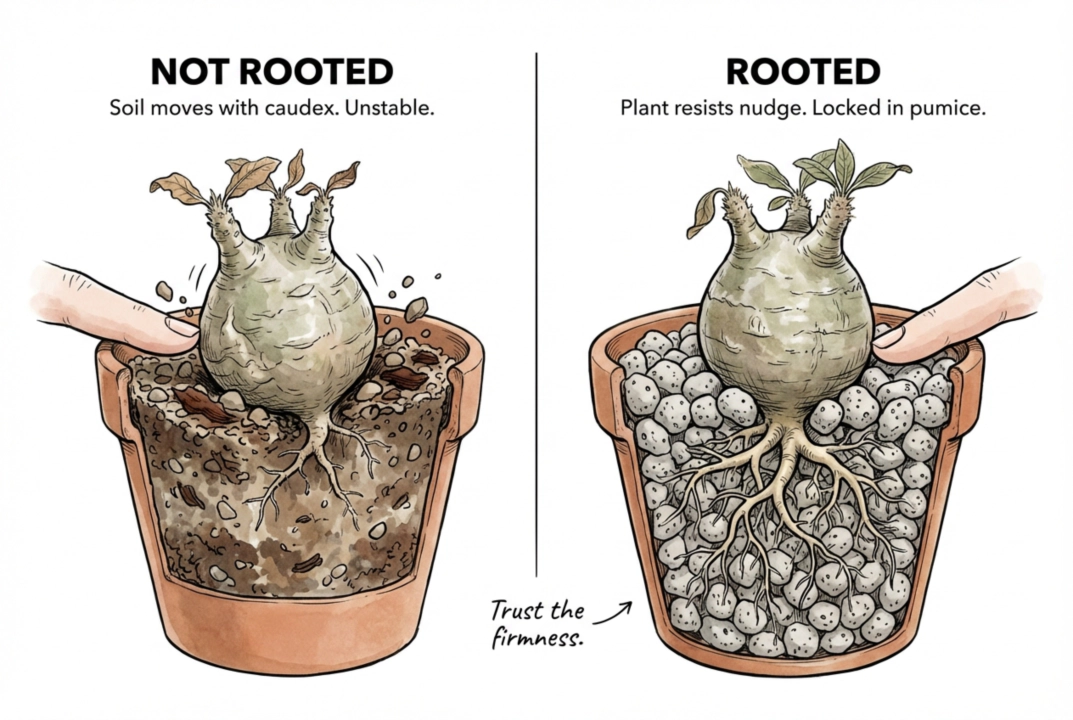
Use stability as one rooting clue
Give the caudex the lightest possible nudge with a finger.
Firm resistance is a hopeful sign that roots have taken hold. Easy movement suggests it hasn’t rooted yet.
Treat this as one clue only. Grit can grip a stem without roots, a rooted plant in loose mix can still shift, and repeated wiggling can snap off young root initials.
Confirm with the fuller picture, steady turgor, new growth that persists, roots visible at the drainage holes or against a clear pot wall, and simply enough time, before declaring success.