
Bringing Caudex Plants Indoors: The 10-Minute Pest Gate
Bringing caudex plants indoors? Run a fast move-in inspection so mites, mealybugs, scale, and fungus gnats do not ride inside for winter.
Maya Ellison · 2026-09-01 · 12 min read
Key Takeaways
- Inspect at move-in, because warm dry indoor air releases pests that outdoor rain and predators kept down.
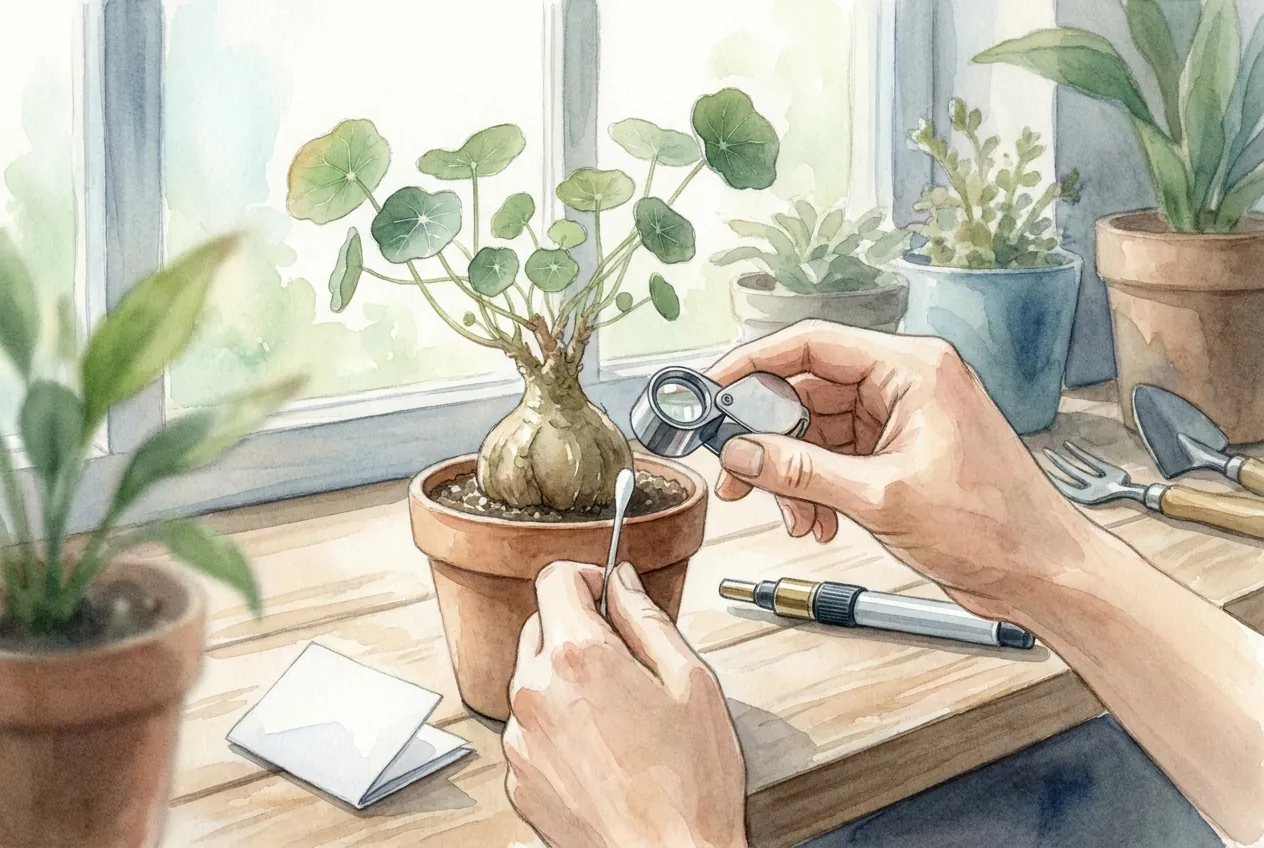
- Run one ordered route per plant with a loupe, white paper, a flashlight, and a swab.
- Read the tap test by movement, since living mites crawl on white paper and dust stays put.
- Rule out corking, edema, lenticels, and leaf scars before you reach for any spray.
- Isolate a suspect plant and re-check weekly, because one look cannot see eggs that hatch later.
A caudex that looked spotless on the patio can seed your whole windowsill three weeks after it comes inside. The plant did not suddenly get infested. Indoor air just released pests that outdoor conditions were hiding.
This is a fast, repeatable inspection you run on every plant before it joins the shelf.
Ten minutes per plant, one ordered route, one clear decision at the end. Pass, isolate and re-check, or contain and treat.
Why indoors is the danger, not outdoors
The move inside is the riskiest moment of the year for a caudex collection. Outdoors, rain knocks mites off leaves, wind and humidity swings stress them, and predators crop the population every day. Indoors, all of that disappears.
Warm, dry, still air is close to ideal breeding weather for the pests that matter most.
Low indoor humidity in heating season is exactly what twospotted spider mites prefer. Nothing is eating them, nothing is washing them off, and the room is warm.
Speed is the problem. Near 75 F, a spider mite goes from egg to adult in about two weeks, and warmer rooms are faster.
A population that was invisible outdoors becomes visible leaf damage within a few weeks inside.
Treat move-in as a quarantine checkpoint, not a homecoming, because indoors removes every natural control that was holding pests back outside.
Where pests hide on a caudex
Each pest hides in a predictable place, and a fat-stemmed plant adds crevices a leaf-wipe never reaches. Learn the map once and the inspection becomes fast. You are visiting known addresses, not searching at random.
Spider mites work the undersides of leaves and the veins. Mealybugs pack into leaf axils, growth tips, and new leaf folds. Scale clamps onto stems, midveins, caudex bark, and graft unions as immobile bumps.
The caudex body is the part most people skip. Folds, old leaf scars, lenticels, and the crown where branches emerge all shelter scale and mealybug crawlers. On a pachypodium, the bark between spine cushions counts too.
Below the soil there is a second world. Fungus gnat larvae live in the damp top inch of substrate, and root mealybugs coat roots and the inside of the pot with white wax. Neither shows from above.
The hiding-place map
| Pest | Where it concentrates on a caudex |
|---|---|
| Spider mites | Leaf undersides and along veins |
| Mealybugs | Leaf axils, growth tips, new leaf folds |
| Scale | Stems, midveins, caudex bark, folds, graft unions |
| Aphids | Soft new growth and flower buds |
| Fungus gnats | Soil surface and top inch of substrate |
| Root mealybugs | Roots and inside pot wall, near drainage holes |
The 10-minute gate, step by step
Run the same ordered route on every plant so nothing gets skipped under a move-in deadline.
Ten minutes per plant is a working budget, not a rule handed down from anywhere. Build the kit once and reuse it every fall.
The tools you actually need
You do not need lab gear. Four cheap items cover every check in this article, and you probably own three of them already.
| Tool | What it catches |
|---|---|
| 10x hand loupe | Mites, scale crawlers, early mealybugs |
| Plain white paper | Moving mites, via the tap test |
| Flashlight at a low angle | Bumps and webbing on caudex bark |
| Dry cotton swab | Confirms whether a cottony fleck smears |
The inspection route
Work top to bottom so you never backtrack. Each step targets one hiding zone from the map above.
- Scan leaf tops for pale stippling or discoloration.
- Turn every leaf and check the underside and veins with the loupe.
- Run the tap test over white paper.
- Check growth tips, axils, and new folds for cottony wax.
- Rake light across the caudex, folds, scars, and any graft union.
- Check the soil surface, drainage holes, and the pot edge.
How to read the tap test
Hold a sheet of white paper under a branch, tap the foliage firmly three times, then wait about ten seconds and watch the paper. Living mites crawl. Dust and debris stay put.
A loupe over the paper separates a moving mite from a piece of lint.
That crawl-versus-still distinction is the whole test. I send any plant with crawling specks straight to isolation rather than the shelf, because a speck that moves on its own is alive. Inert dust does not walk.
The five signatures you are looking for
Most pests announce themselves through damage before you ever see the insect. Learn the signature and the confirming check for each one. That pairing is what turns a nervous guess into a confident decision.
Spider mites
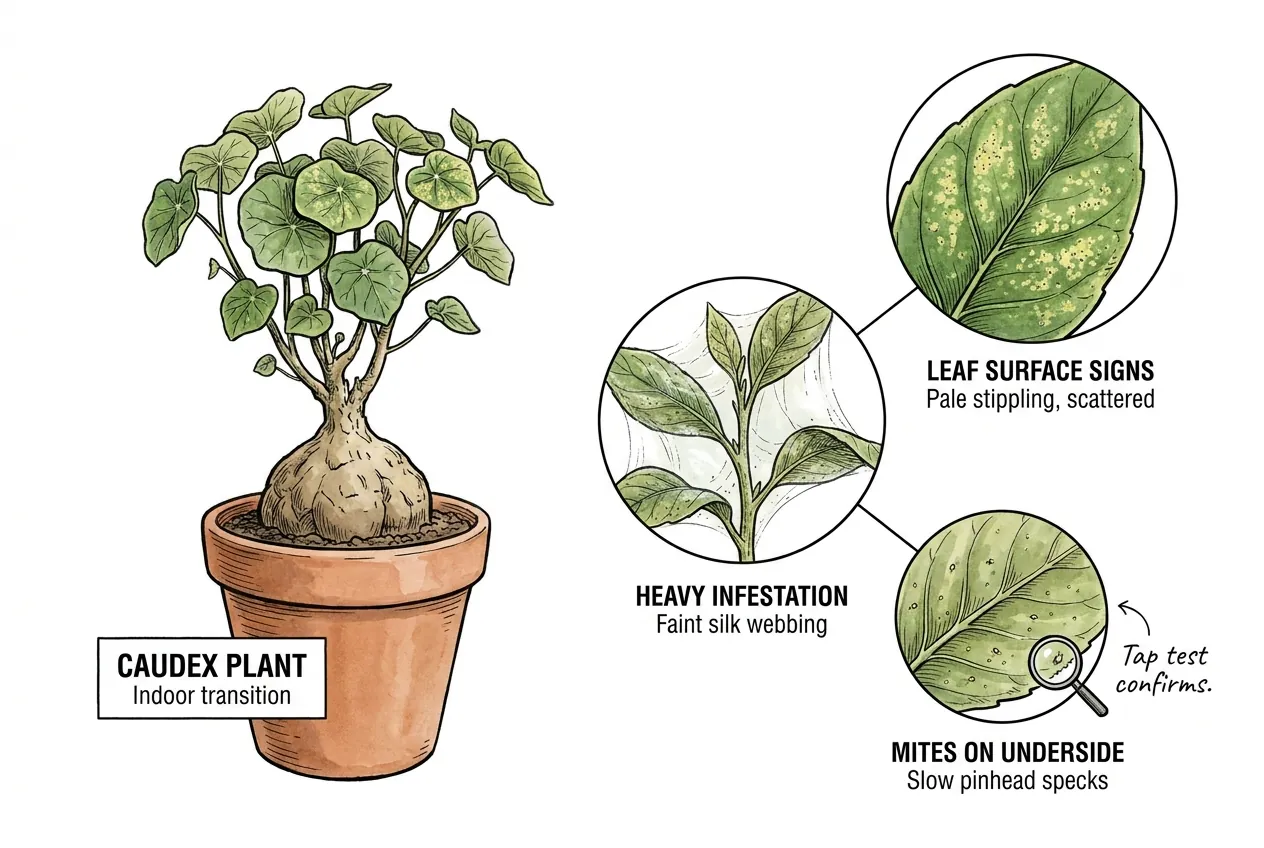
The first sign is fine, evenly scattered pale stippling on the upper leaf surface. Heavy infestations add faint silk webbing between leaf and stem. The mites themselves are slow pinhead specks on the underside, and the tap test confirms them.
Mealybugs
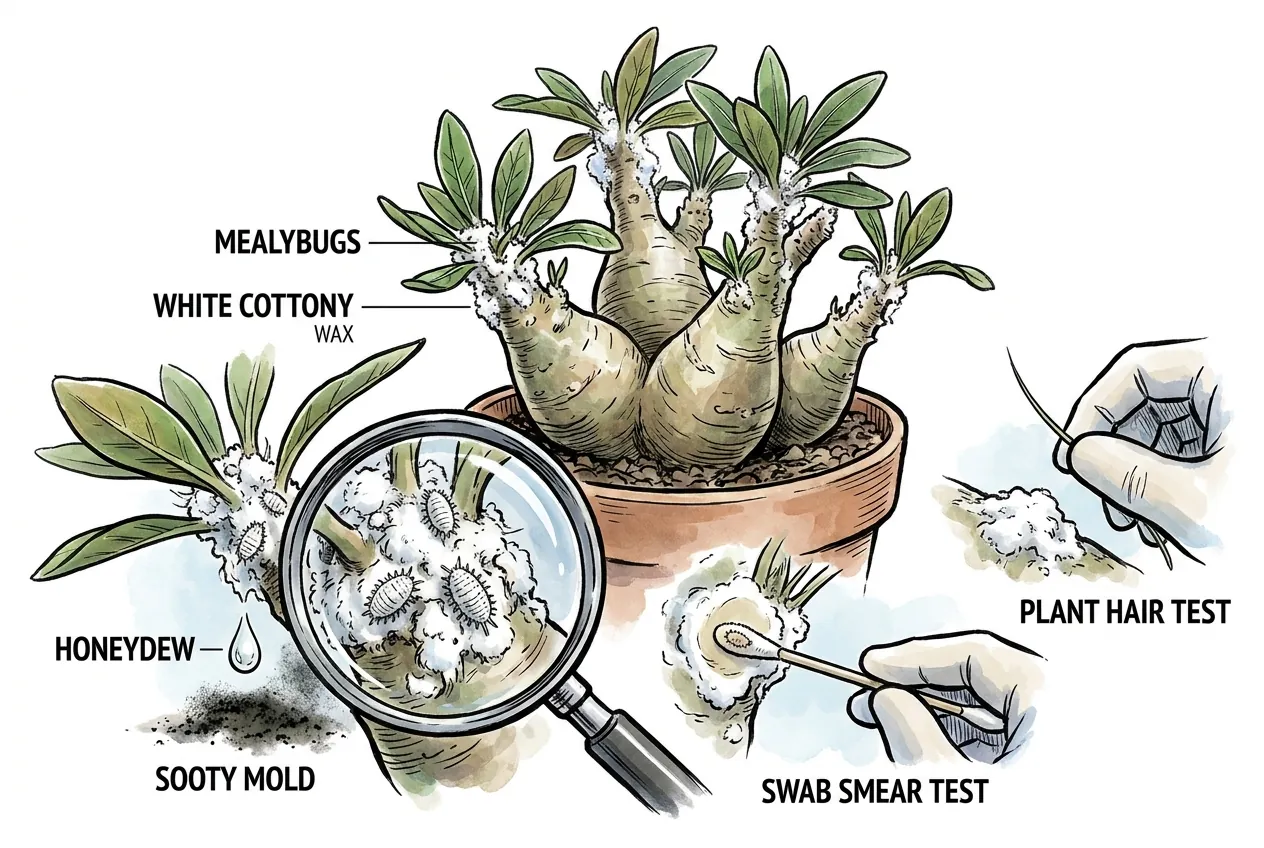
Look for soft bodies under white cottony wax tucked into axils and growth tips. Sticky honeydew and black sooty mold often show up nearby. A dry swab smears the waxy mass and reveals the insect, while a plant hair will not smear.
Scale
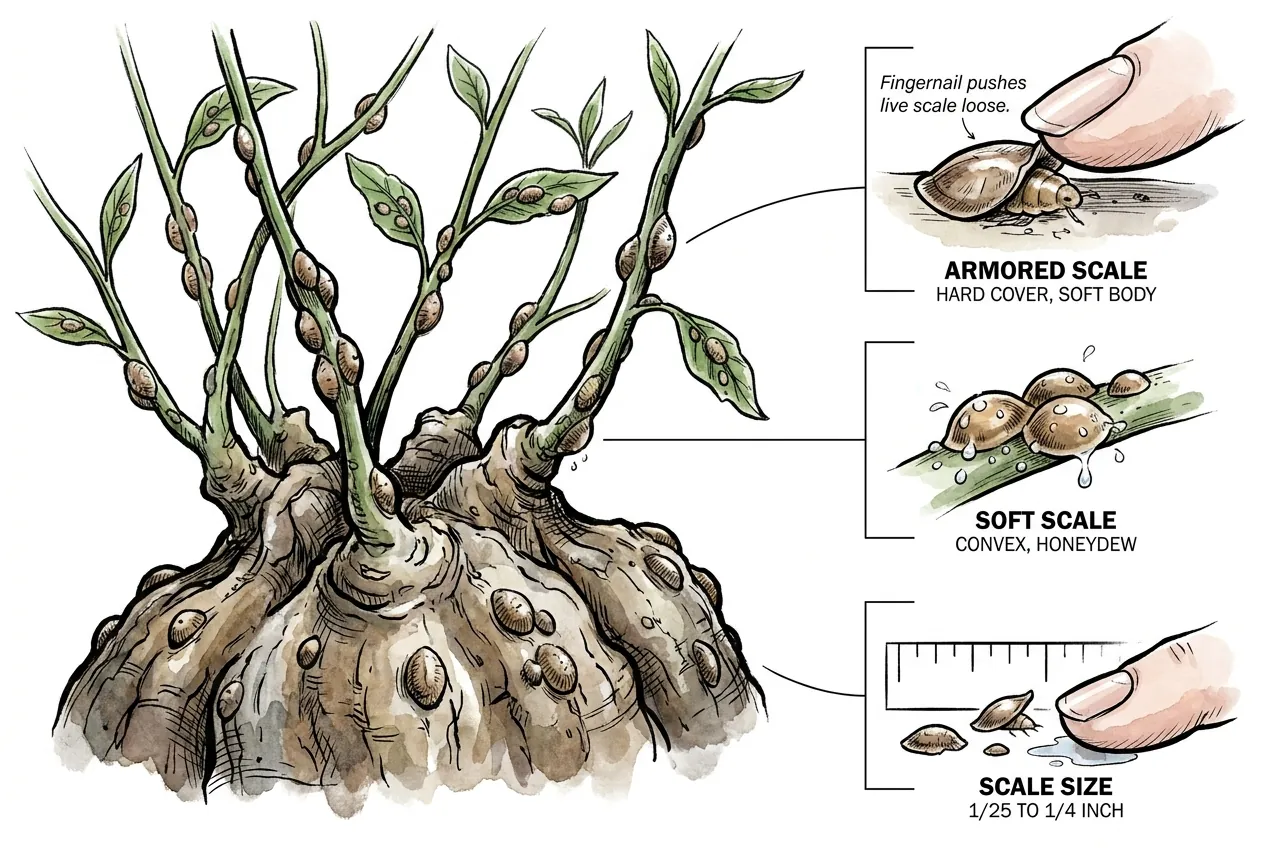
Scale reads as immobile bumps on stems, midveins, and caudex bark, from about 1/25 to 1/4 inch.
Armored covers lift off a soft body underneath, and soft scale stays convex and leaks honeydew.
A fingernail pushes a live scale loose and often exposes a soft body or wet spot.
Aphids
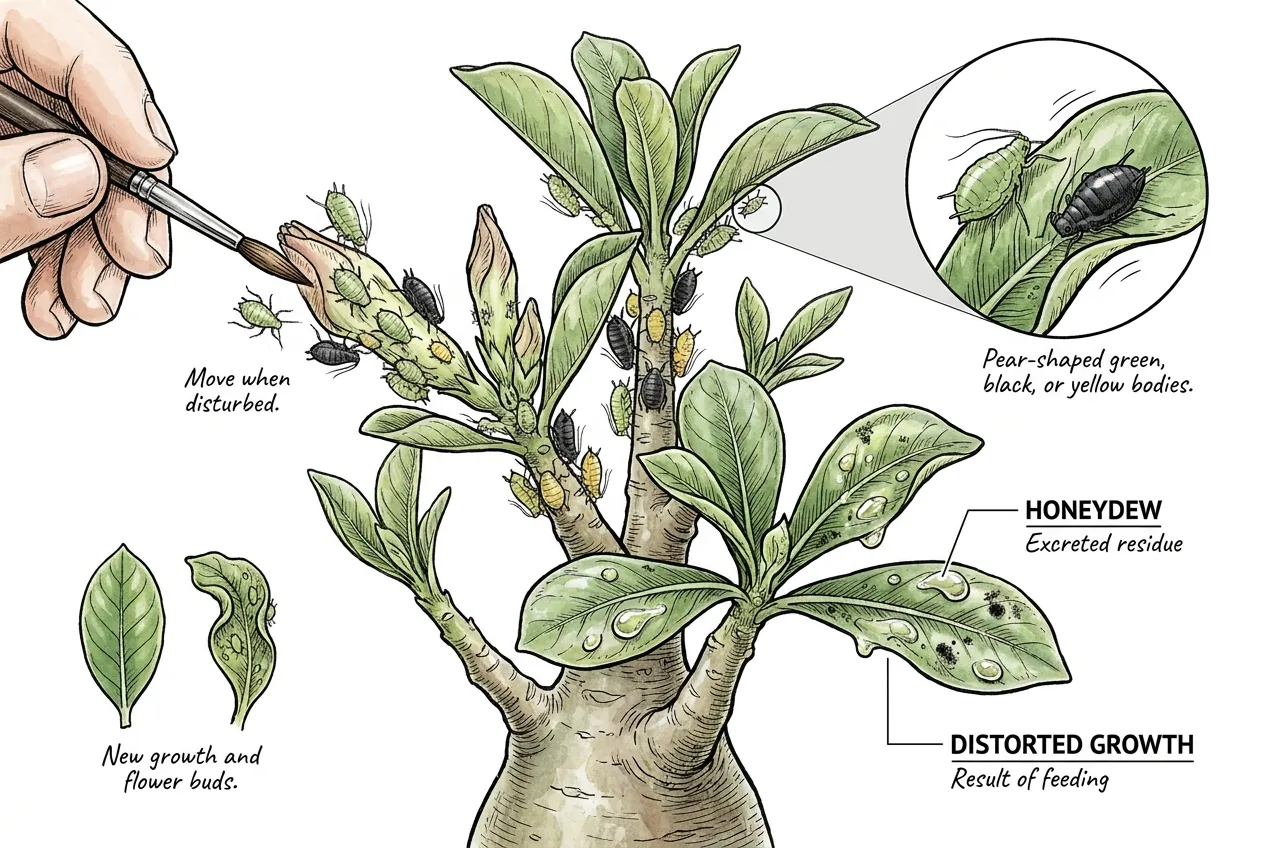
Aphids cluster on the softest new growth and flower buds as pear-shaped green, black, or yellow bodies. They leave honeydew and distorted growth. They move when disturbed, which separates them from static bumps.
Fungus gnats
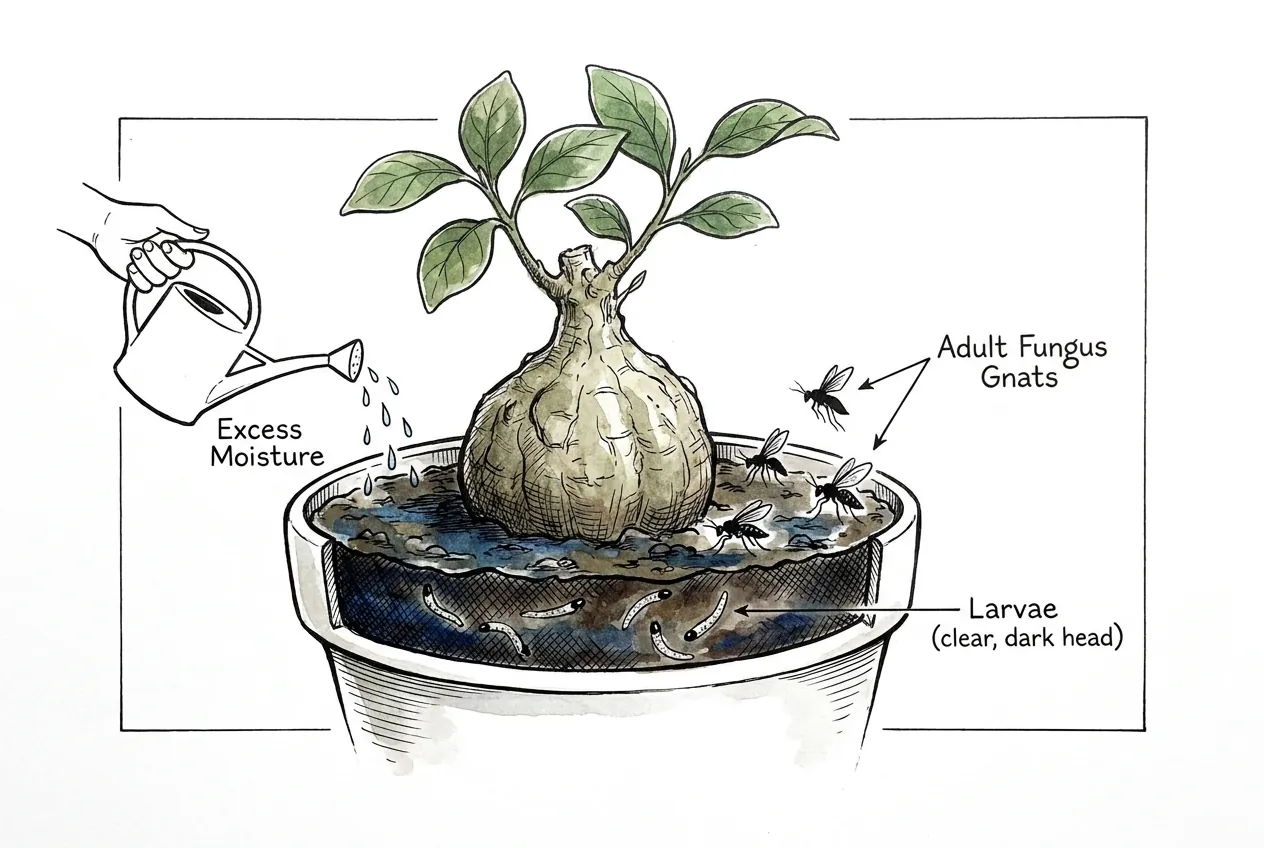
Small dark flies running across the soil or rising when you water are the adult tell.
The damaging larvae are clear with a dark head in the moist top inch of substrate.
Their presence also flags substrate that is staying too wet for a slow caudex.
Match each signature to its confirming check before you act, because the damage often shows up a week before the pest is large enough to see.
Bark that looks scary but is not a pest
Half of move-in panic is caused by normal caudex texture. Before you reach for a spray, rule out the cosmetic look-alikes. Treating bark as an infestation wastes product and stresses the plant for nothing.
Corking is dry, tan-to-brown suberized bark on older tissue. It is fixed, matches the plant, and has no soft body underneath. Edema is small raised blisters from water taken up faster than it transpires, common after a heavy watering in low light.
Lenticels are the bark pores, arranged in the plant’s own even pattern. Old leaf scars are symmetric structural marks where leaves detached. None of these move, spread, or leak honeydew.
Three quick tests settle it every time. A live pest pushes loose to a soft body or wet spot, while bark stays firmly attached and dry.
Pests cluster in axils and folds, cosmetic features follow the plant’s symmetry, and only sucking pests leave sticky honeydew.
If you want the deeper firmness-and-fingernail workup for corking and scale look-alikes, the caudexology guide on scale, corking, and edema walks through it.
The pass the leaf check misses, the root zone
Two damaging pests live where the leaf inspection cannot see them. Skipping the soil pass lets both walk indoors on an otherwise clean plant. A caudex in fast gritty mix makes this pass quick and low-risk.
Fungus gnat larvae live in the damp top inch of substrate, and the adults fly up when you disturb or water the surface.
A yellow sticky card laid near the soil confirms adults over a day or two without touching the roots.
A gnat find also tells you the mix is staying too wet.
Root mealybugs show as white waxy deposits on roots and the inside of the pot, often near the drainage holes.
The low-risk check is to slide the plant partway out, look at the outer root ball and pot wall, then reseat it.
Fast caudex mixes let the root ball hold together and slip back without damage.
When a surface check is enough
A soil-surface scan plus the pot-edge slip-check clears a plant that is staying in its pot and passed the leaf gate.
Do not unpot a dormant or rot-prone caudex on a whim, because root disturbance plus wet media is its own rot risk.
When to go bare-root
Go to a full bare-root inspection only on a trigger. Repotting the plant anyway is one. Mealybugs found above the soil is another.
Any white waxy deposit on the outer root ball is the third.
Why one look never clears a plant
A single inspection cannot see eggs, so a plant that reads clean today can bloom with crawlers next week.
Eggs sit in protected spots, on leaf undersides for mites and in axil folds for mealybugs. The waiting period exists to catch what hatches.
The timing is not guesswork. Near 75 F, mites run egg-to-adult in about two weeks, so a missed egg batch shows as fresh crawlers within one to two weeks.
Fungus gnat larvae also move through their stages in one to two weeks before new adults emerge.
Extension guidance is to isolate incoming plants away from the collection and re-examine them about once a week.
A common recommended window is two to three weeks, and some sources isolate longer for stronger protection. Isolation means physically separate, not another spot on the same shelf.
My re-check cadence
I re-inspect each isolated plant every seven days for three checks, and I mark two reference leaves so I compare the same tissue each time.
Three clean weekly checks in a row clear the plant to the shelf. Any new crawler or fresh stippling on the marked leaves restarts the count at zero.
The seven-day interval and three-check span are my conservative working rule, not a published standard. I chose them because that span covers the common mite and mealybug egg-to-crawler windows at indoor temperatures.
The restart rule holds because a fresh hatch means the plant is not clean, no matter how good the earlier checks looked.
What to do when the gate finds something
The gate ends at diagnosis and containment, and treatment is the next decision. When a plant fails, it stays off the shelf, which is already the isolation posture from the quarantine step. First moves are physical and cost nothing.
A firm water rinse of the foliage knocks down mites and dislodges many crawlers, and frequent leaf washing is a standard first-line mite control. A swab handles spot mealybug and scale. A fungus gnat find is fixed first by letting the top inch or two of substrate dry, which breaks the larval cycle with no product at all.
When an infestation is confirmed, persistent, or spreading, the treatment product is a separate choice this article does not make for you.
For a confirmed mite problem, the caudexology spider mite treatment chooser compares the options for a caudex collection.
Confirmed root mealybugs route to the root mealybug treatment guide, and soaked or damaged tissue that raises a rot risk routes to the caudex root rot fungicide chooser.
Contain first with isolation and a rinse, then choose a treatment only after the gate confirms a real, spreading pest.
Key Takeaways
- Inspect at move-in because warm, dry, still indoor air releases pests that outdoor rain and predators were suppressing.
- Run one ordered route per plant with a loupe, white paper, a flashlight, and a swab, top of the plant to the pot.
- Read the tap test by movement, since living mites crawl on white paper and inert dust stays put.
- Rule out corking, edema, lenticels, and leaf scars before you ever reach for a spray.
- Isolate a suspect plant and re-check weekly, because one look cannot see the eggs that hatch next week.